Cards – Save Your Store's Documents and Copy Snippets
Cards (Kort) are the heart of BikeOffice. A card holds a piece of information your shop needs often — a routine document, a useful link, or a snippet of text you copy again and again. You create cards once, and they appear on the Counter (Kassa) and Workshop (Verkstad) pages for everyone to use.
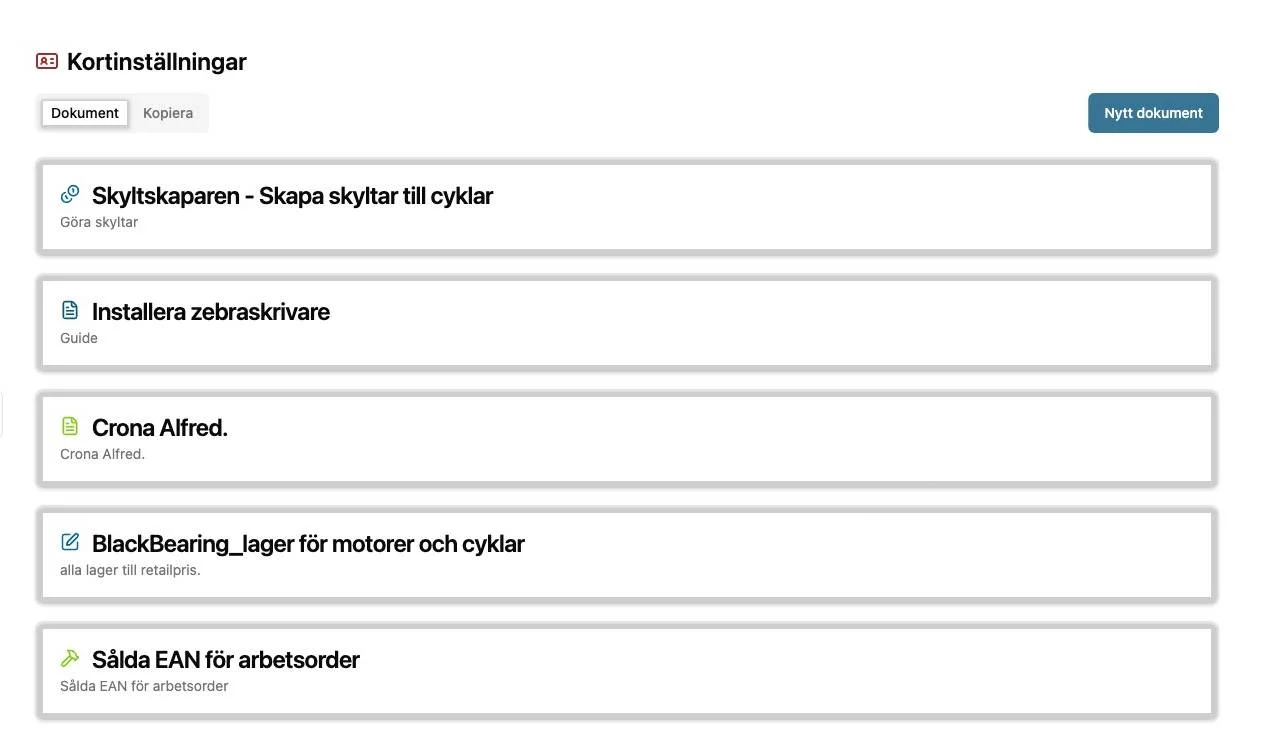
The two types of card
- Document card (Dokument): holds information — either a written document you create in the built-in editor, or a link to an external page (a guide, a Google Drive folder, a supplier login). Use these for routines, checklists, and how-to guides.
- Copy card (Kopiera): holds a short piece of text that staff copy with one click — such as your org number, shop address, the email address receipts are sent to, or a server IP. On the page, selecting the copy icon puts the text straight on the clipboard.
Why it matters
Every shop has answers that live in someone's head or a sticky note: "Where do we send the bookkeeping receipts?", "What's our customer number at that supplier?", "What's the standard wording for a warranty email?" Cards turn that scattered knowledge into something every team member can find in seconds — and paste without typos.
How to add a card
- Open Inställningar (Settings) from the top menu.
- Select Card settings (Kortinställningar) in the left menu.
- Choose the tab for the type you want: Documents (Dokument) or Copy (Kopiera).
- Select New document (Nytt dokument) or New copy card (Nytt kopierakort) on the right.
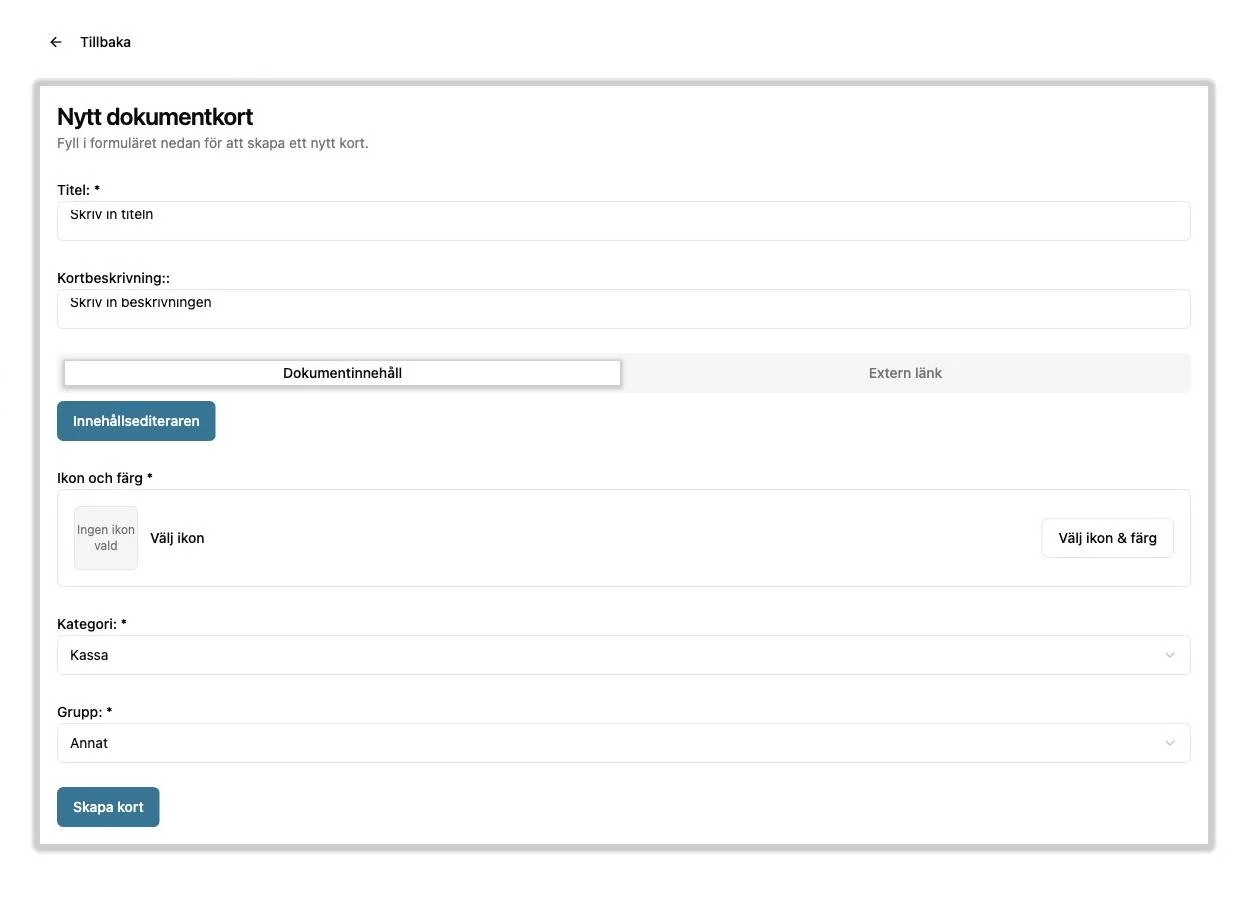
- Fill in the form:
- Title (Titel): the name shown on the card. Keep it short and searchable.
- Card description (Kortbeskrivning): a line explaining what the card is for.
- Content: choose Document content (Dokumentinnehåll) to write text in the editor, or External link (Extern länk) to point the card at a web address. (For copy cards, this is the text that gets copied.)
- Icon and colour (Ikon och färg): select Choose icon & colour (Välj ikon & färg) to give the card a recognisable look.
- Category (Kategori): choose Kassa (Counter) or Verkstad (Workshop) — this decides which page the card appears on.
- Group (Grupp): choose a group so the card is sorted under the right heading on the page.
- Select Create card (Skapa kort).
Your new card now appears on the matching page and in search.
Editing and pinning
- To change a card later, open it from Card settings and edit it.
- On the Counter and Workshop pages you can pin important cards (the pin icon in the top corner of a card) so they stay at the top.
Related
- Counter and Workshop Pages — where your cards show up in daily use.
- Getting Started — recommended first cards to create.